Prisma? Drizzle?
The modern web development era has given birth to some of the greatest technologies. But with this great power comes the great responsibility of choosing the right technology for the right job. This can be daunting, especially for new developers. Luckily, when it comes to full-stack development with Next.js, it’s fairly simple to choose between an ORM. The most common picks are Prisma and Drizzle, mainly due to them being open-source and type-safe.
Use Cases
These ORMs are often used separately as they have their own strengths and weaknesses. Prisma is known for its phenomenal developer experience while Drizzle shines when it comes to speed. Using both these ORMs in the same project may not be the best idea, but it is possible. It will allow you to easily design schemas and migrate them while having a fast backend. If you already have an API built out with Prisma, here are some cases when you might want to go with this dual ORM strategy:
- Small API that can quickly be re-written in Drizzle
- Slow/heavy backend that needs improvements
- Want to gain privileges to say “I use Drizzle btw”
Demo Repository
If you find anything confusing while following this guide, feel free to use this repository as a reference. I am planning to create a proper standalone starter template for a Prisma and Drizzle dual ORM Next.js app very soon.
Setup Neon PostgreSQL
Before we set up a PostgreSQL instance on Neon, just know that both Prisma and Drizzle do not support all database engines. Drizzle supports every PostgreSQL, MySQL and SQLite database while Prisma supports those along with MongoDB and CockroachDB.
Create Project
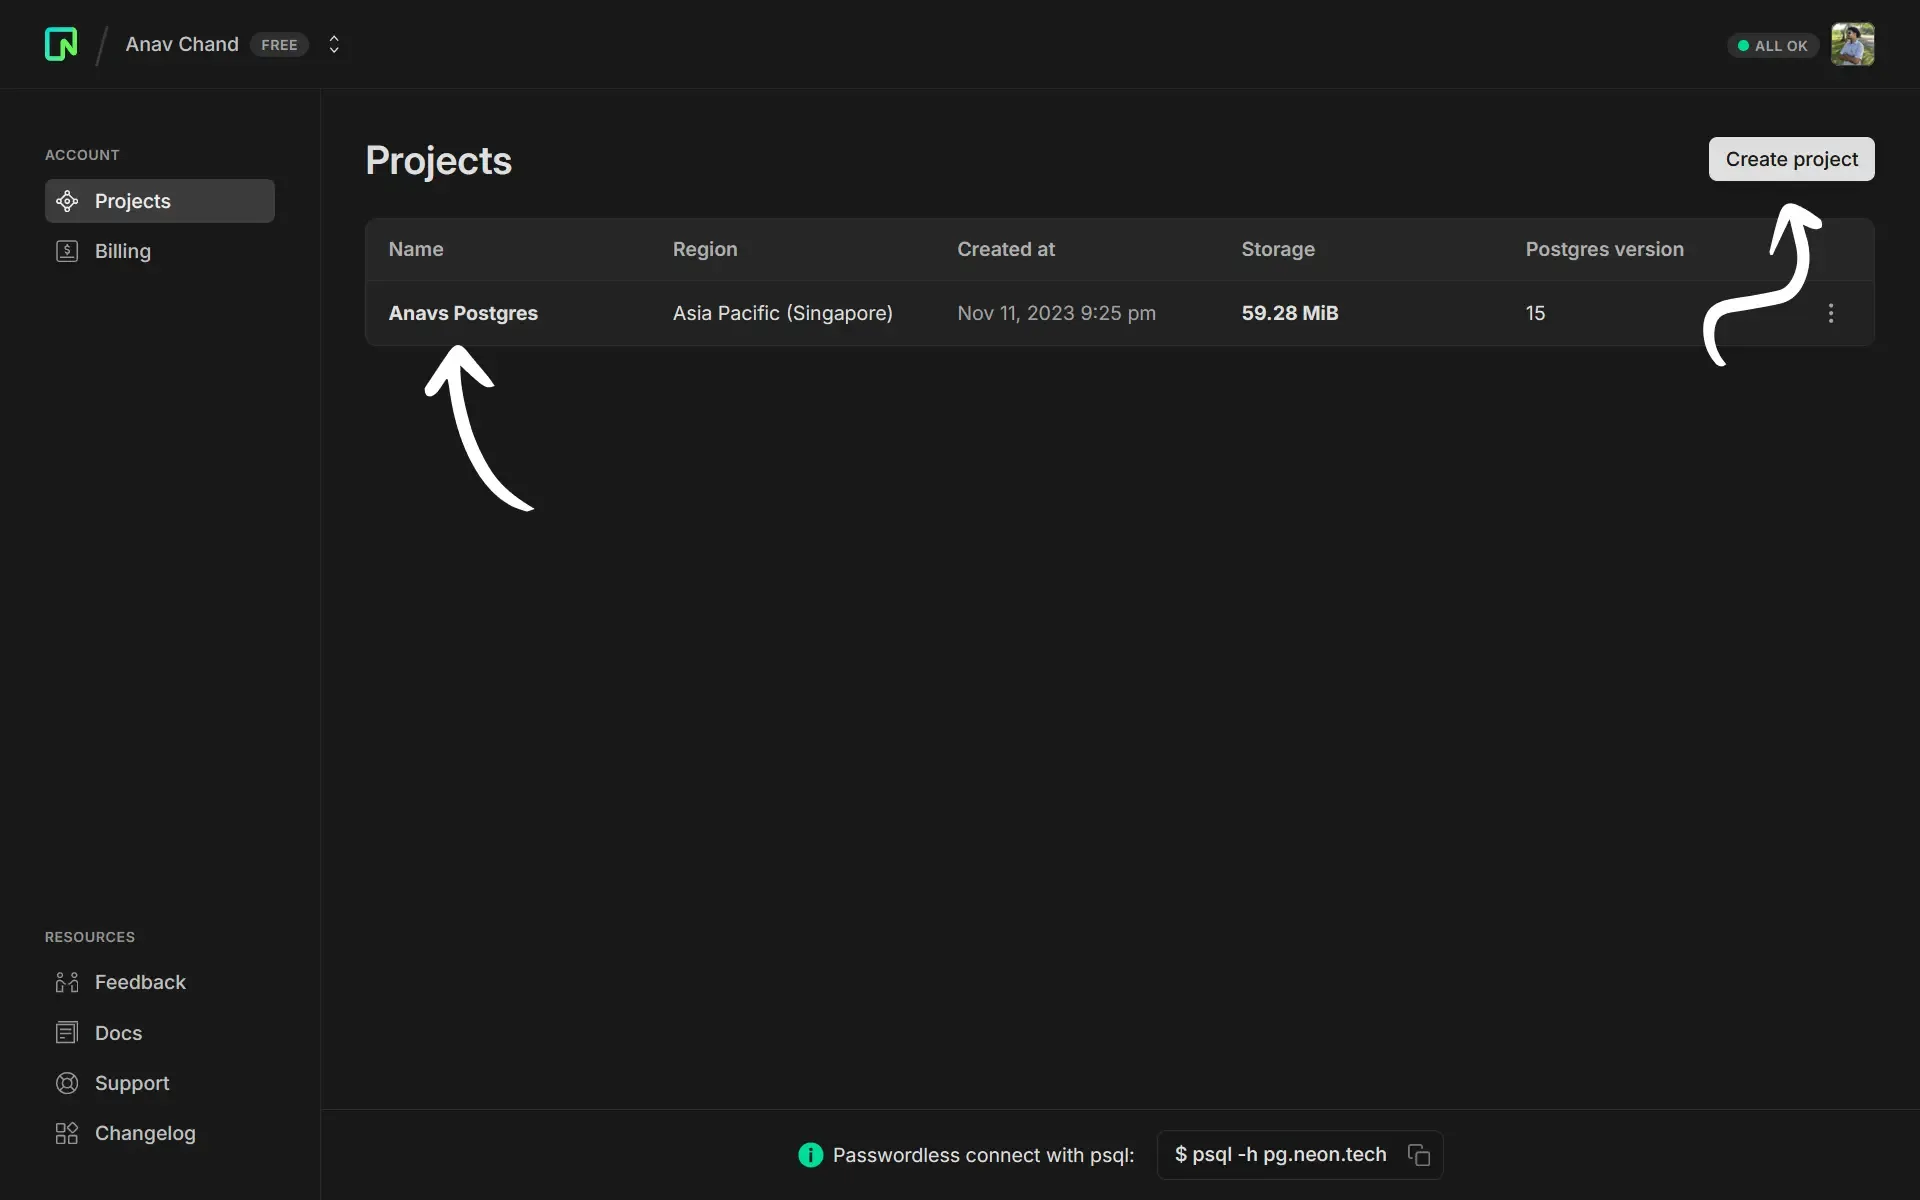
Head over to Neon, create an account if you do not have one already, and then create a project. You will be able to create multiple databases within a single project. The free tier will bless you with a single project with 5GB storage across all databases.

Create Database
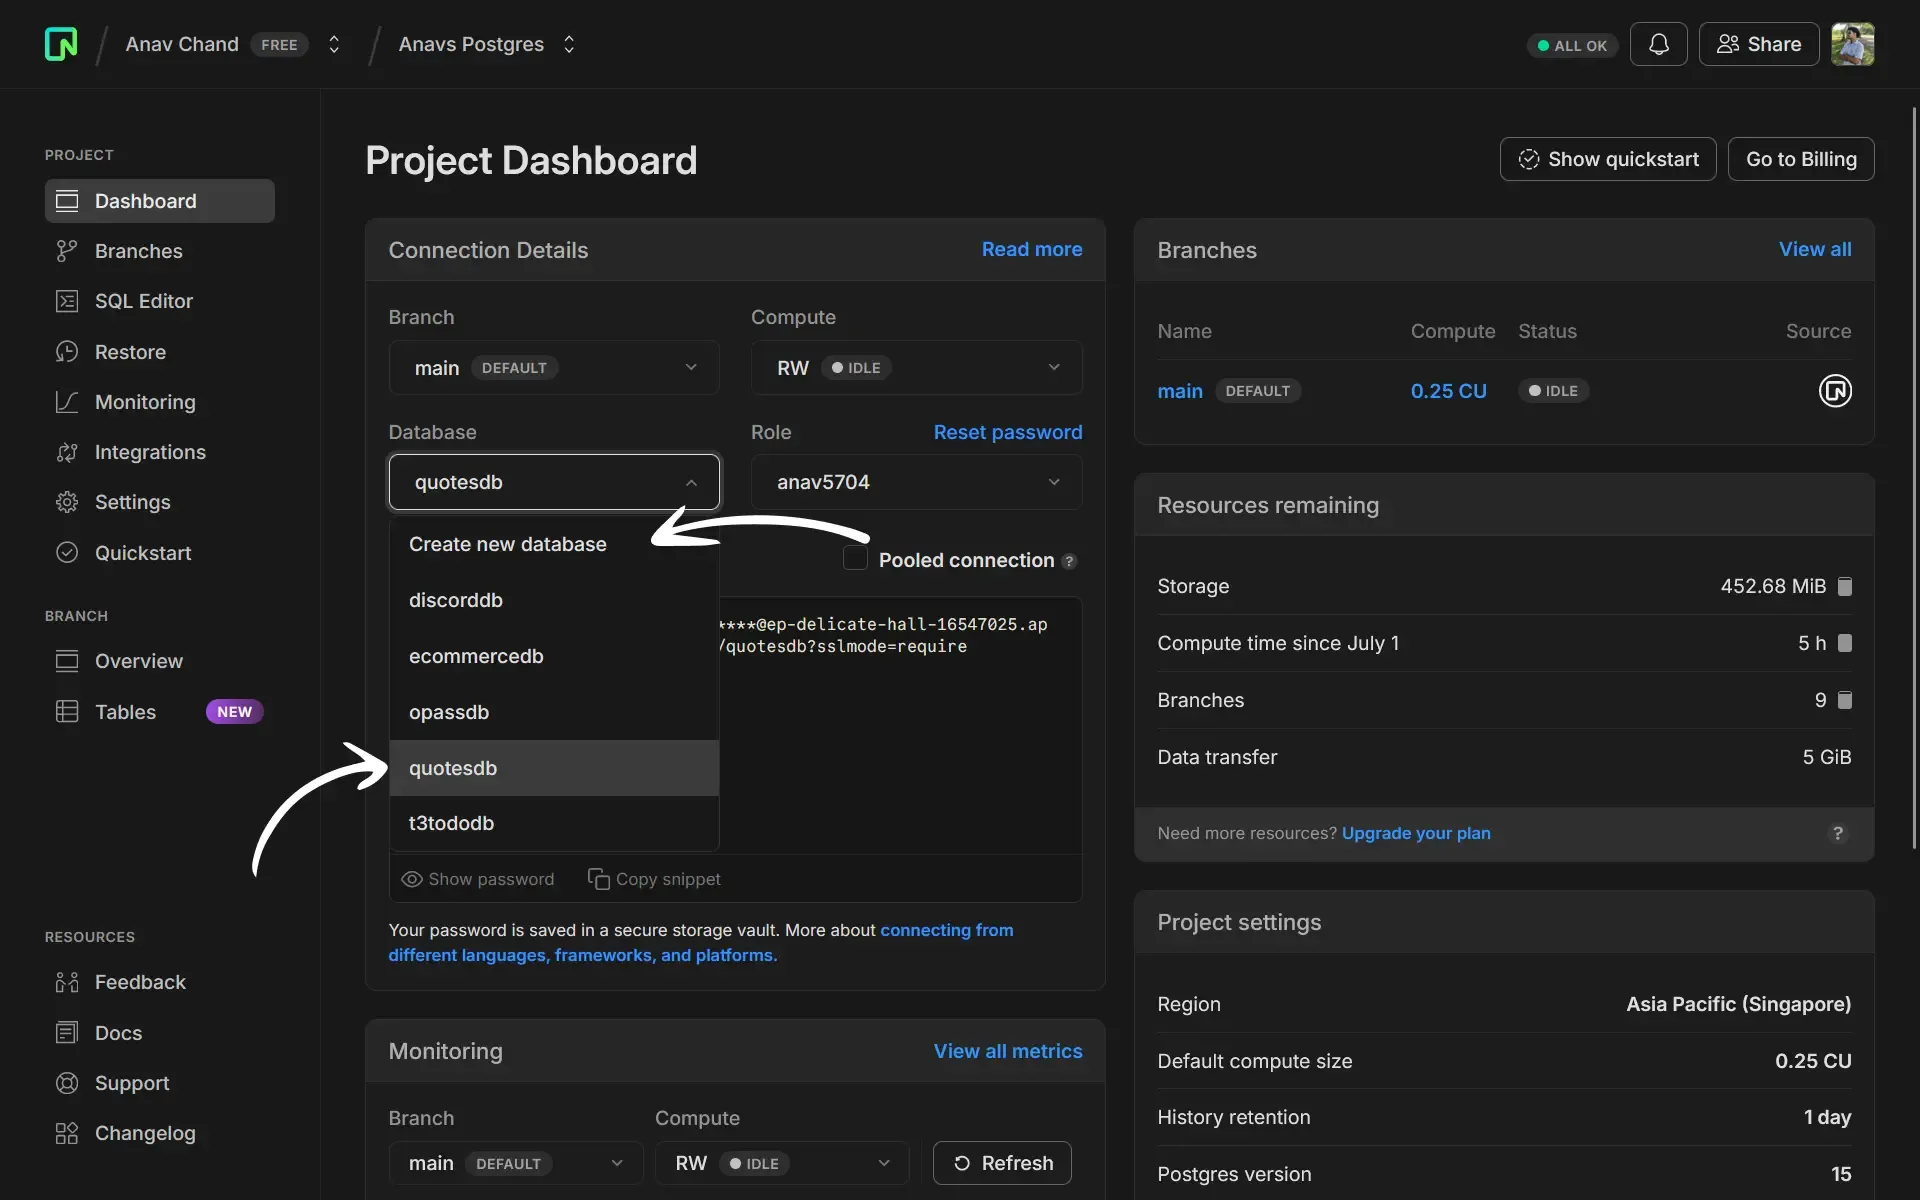
Navigate to your dashboard and create a database by clicking on the database dropdown. You will be required to give it a name. Alternatively, you can choose to use an existing database.

Connection String
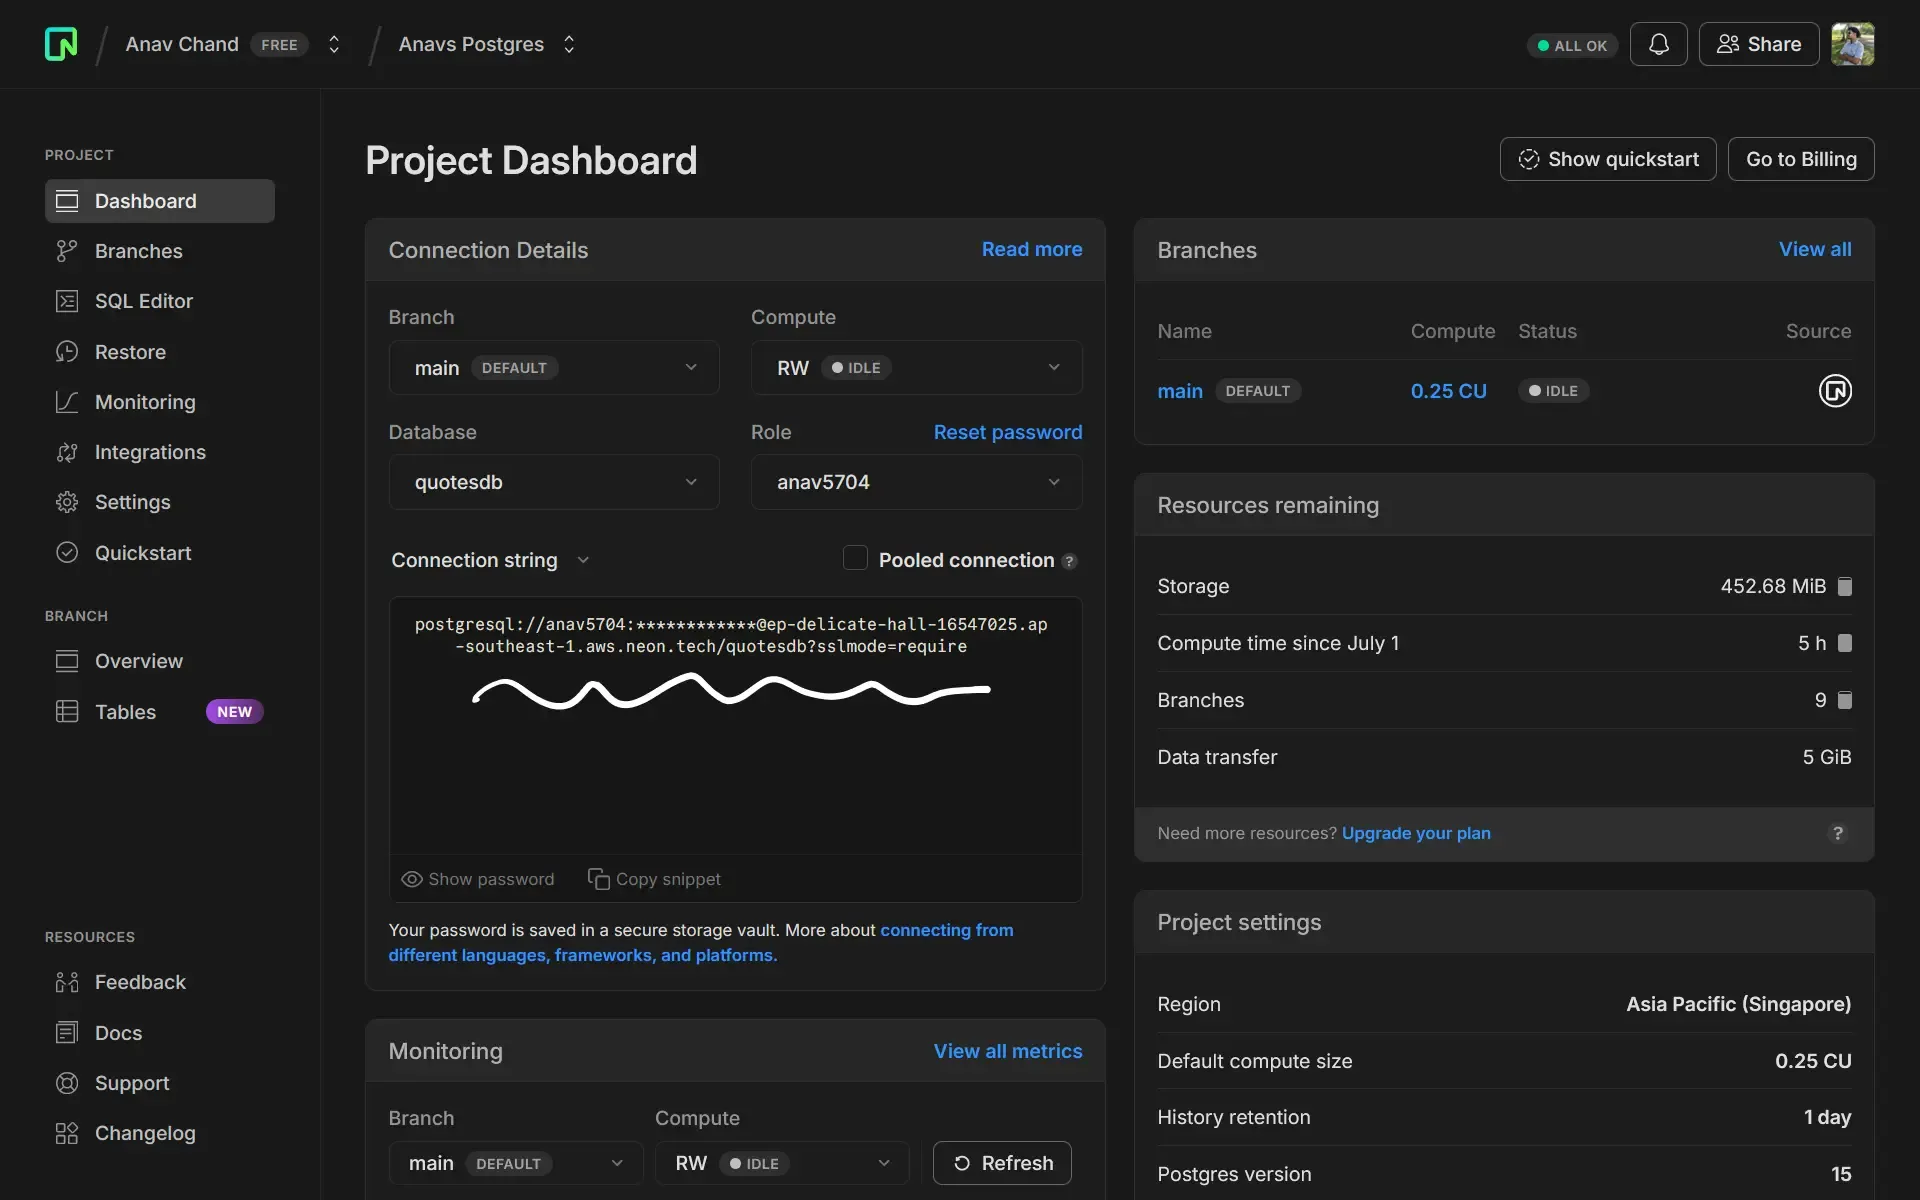
Click on the dropdown under the database dropdown and choose the connection string. Make sure you have the correct database selected.
Now copy the connection string and go back to your project. Create a .env file if you don’t have one and paste your connection string. It should look something like this:
DATABASE_URL="postgresql://username:password@hostname:port/database"Setup Prisma ORM
In our dual ORM strategy, Prisma will be used to make the database schema and will be responsible for pushing the schema to the database. It will act as the creator and sender.
Install Prisma
Assuming you already have a Next.js app with typescript ready to go, we are going to install Prisma.
npm install prisma --save-devThe following command will create a prisma directory that contains a schema.prisma file. It will hold our database connection and data models.
npx prisma initNow we are going to connect Prisma to our database. Add the following to the top of your file:
datasource db {
    provider = "postgresql"
    url      = env("DATABASE_URL")
}
Prisma Client
To migrate our database schema, we will need to install the Prisma client.
npm install @prisma/clientModel A Schema
Just to have something to test against, let’s make 2 simple models with a relationship. The first will be a user that can create many quotes. The second will be a quote that can only have one owner.
model User {
    id     String  @id @default(uuid())
    name   String
    email  String
    quotes Quote[]

    createAt DateTime @default(now())
}

model Quote {
    id      String @id @default(uuid())
    content String
    userId  String
    user    User   @relation(fields: [userId], references: [id])

    createdAt DateTime @default(now())
    updatedAt DateTime @default(now())

    @@index([userId])
}
Setup Drizzle ORM
Drizzle will be used to pull the schema from the database and make the actual queries from our backend. It will act as a receiver and consumer.
Install Drizzle
First, we are going to install the Drizzle ORM itself and the Neon serverless adapter for it.
npm install drizzle-orm @neondatabase/serverlessDrizzle Kit
Drizzle kit is a CLI that will help us generate the schema and relations from our database. It also lets us view our data locally using Drizzle Studio.
npm install drizzle-kit --save-devConnect To Neon
Make a drizzle directory at the root of your project. Inside that, make an index.ts file and paste the following code into it:
import { neon } from "@neondatabase/serverless";
import { drizzle } from "drizzle-orm/neon-http";

const sql = neon(process.env.DATABASE_URL!);

export const db = drizzle(sql);
We will also have to create a drizzle.config.ts at the root of the project. This just tells Drizzle where the schema is and where to generate the migrations.
import { defineConfig } from "drizzle-kit";

export default defineConfig({
    dialect: "postgresql",
    schema: "./drizzle/schema.ts",
    out: "./drizzle",
    dbCredentials: {
        url: process.env.DATABASE_URL!
    }
});
Push And Pull Schema
Checkpoint! Your project structure should look something like this right now:
Quotes-App
├── app
├── drizzle
│   └── index.ts
└── prisma
    └── schema.prisma
Push Schema
To migrate our schema to the Neon database, we run the push command that comes with the Prisma client:
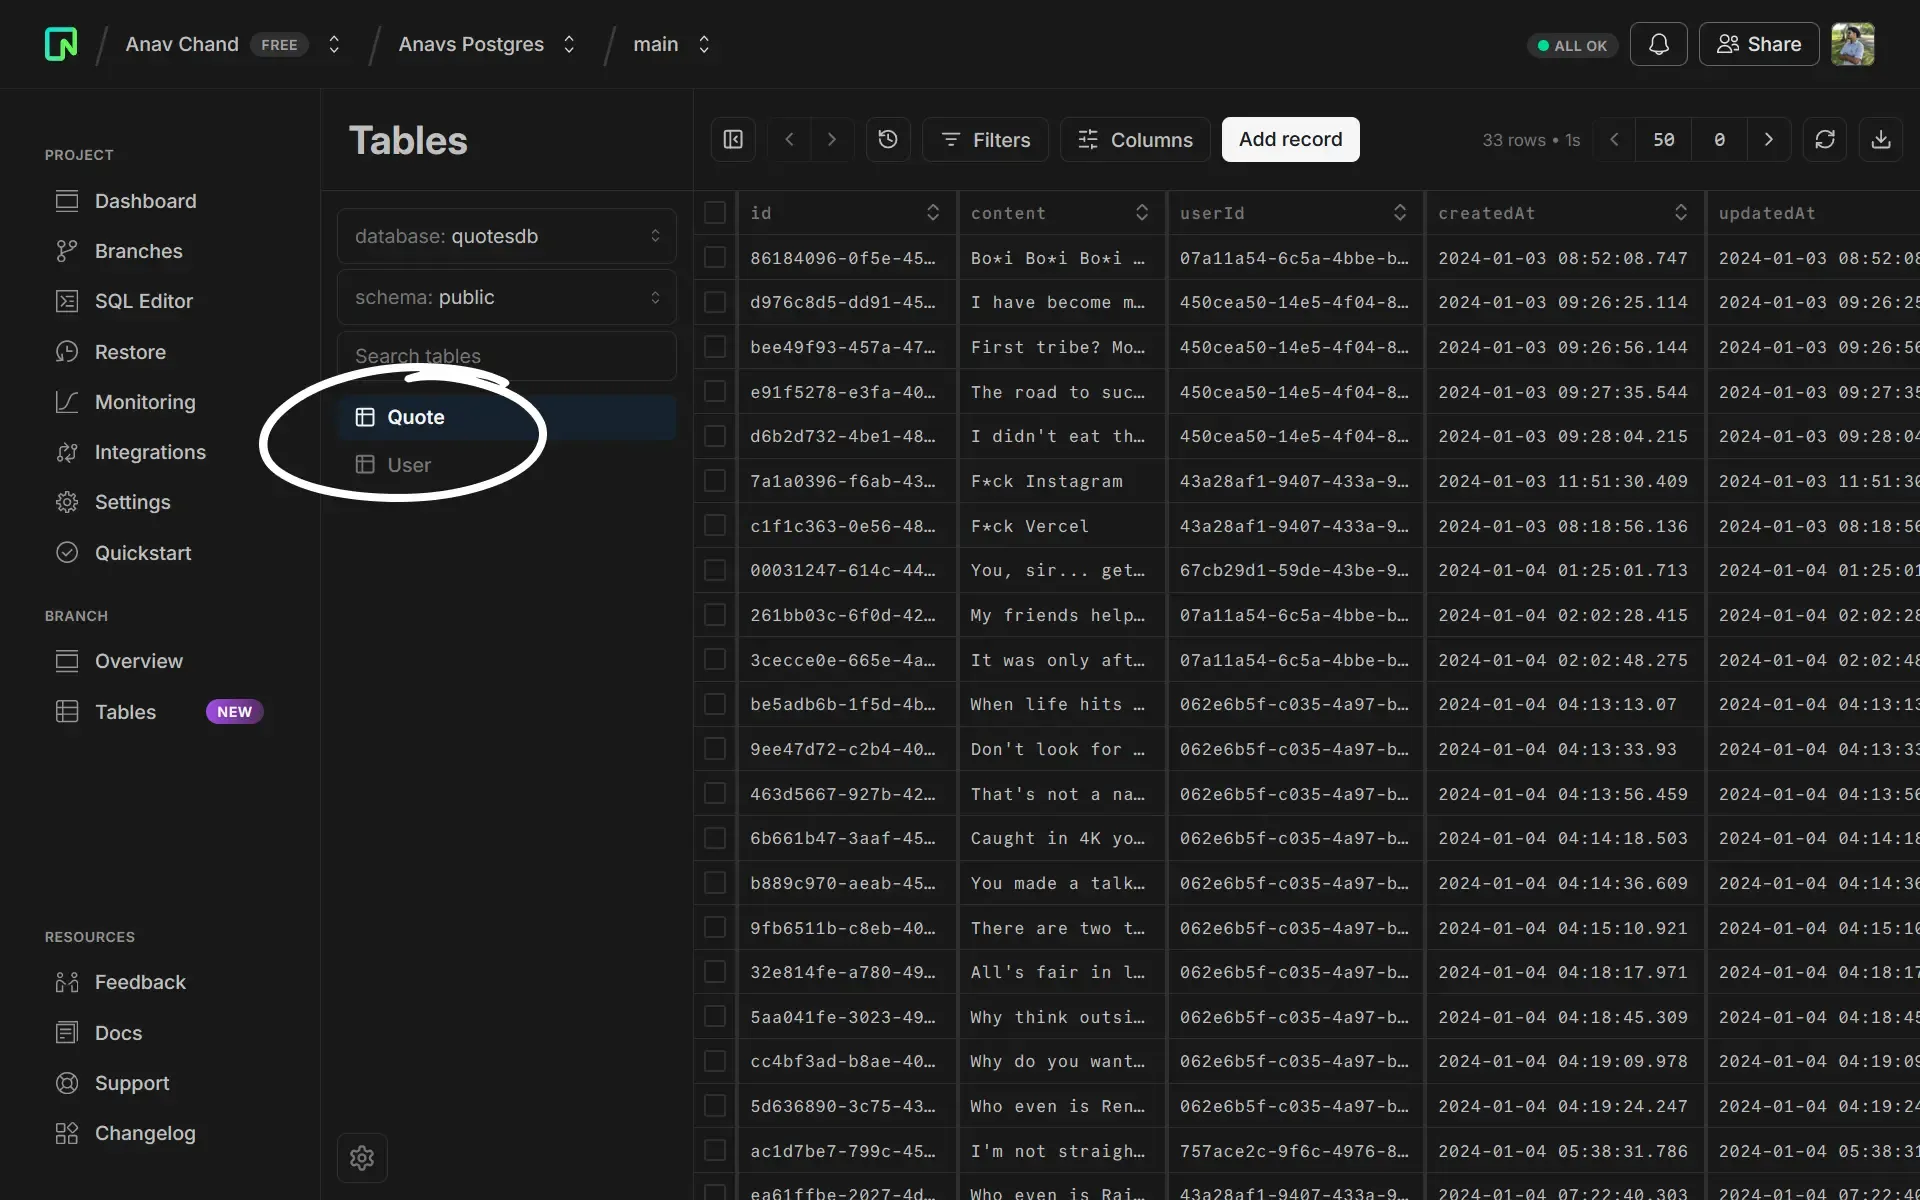
npx prisma db pushHead over to your Neon dashboard and go to the tables view. You can see the schema you just pushed in there.

Pull Schema
Now that our schema is out of Prisma, we can use Drizzle kits pull command to automatically generate the data models and relations in Drizzle.
npx drizzle-kit introspectAfter Drizzle is done pulling the schema, it will generate 2 new files in the drizzle directory: a schema.ts file and a relations.ts file. Your new structure should look like this:
Quotes-App
├── app
├── drizzle
│   ├── index.ts
│   ├── schema.ts
│   └── relations.ts
└── prisma
    └── schema.prisma
Let’s quickly edit our drizzle/index.ts to tell Drizzle where our new schemas and relations are:
import { neon } from "@neondatabase/serverless";
import { drizzle } from "drizzle-orm/neon-http";

// import new data models and relations
import * as relations from "@/drizzle/relations";
import * as models from "@/drizzle/schema";

const sql = neon(process.env.DATABASE_URL!);

// tell drizzle to use them
export const db = drizzle(sql, { schema: { ...models, ...relations } });
You are now all set to import the database anywhere and start using it.
import { db } from "@/drizzle";NPM Script
Running the Prisma pull and Drizzle introspect command every time you update your schema will get annoying. To make our lives a bit easier, let’s create a custom NPM script to do both of these for us. Add this to your package.json:
"scripts": {
    "db:new": "npx prisma db push && npx drizzle-kit introspect"
}
Now all you have to do is run the following command:
npm run db:newGenerating Schema Types
One of the things that makes Prisma shine is prisma generate. This command automatically generates types from your schema and lets you use them in your code.
import { User, Quote } from "@prisma/client";Drizzle on the other hand has no such command. Instead, we will have to infer the types from the data models ourselves. Make a types directory with an index.ts file in it. In our case, we will need to make types for our User and Quote model.
import { User, Quote } from "@/drizzle/schema";

export type User = typeof User.$inferSelect;
export type Quote = typeof Quote.$inferSelect;

export type QuoteUser = Quote & { User: User };
And with that, we have successfully set up a Prisma ORM and Drizzle ORM in the same project.
Final Thoughts
Using both Prisma and Drizzle in the same project may not be for everyone, but it can be done. Setting up this dual ORM strategy allows us to enjoy the convenient Prisma schema language while having a performant backend. I wanted to implement this in a project of mine, but I already had ~35 API endpoints and ~15 server actions built out using Prisma. Converting these queries to Drizzle seemed like a nightmare, so I stuck with a full Prisma setup. That being said, I hope this guide helps you out.
